
Guides › System
Earth and Grass Combat: Waleetle Overload and Burrowing
How Waleetle's Overload Energy, Bouldus's Rock Piles, tunnelling and Grass stack systems actually play out in a fight.
The short version
- Earth attacks are super-effective against Lightning and Ice, and a real threat to lightning-based teams
- A fully charged Overload Energy gauge makes Waleetle's next skill deal 40% extra damage
- Sandstorm Spin cast on a full gauge reaches maximum speed immediately, and hits broken targets harder
- Stone Ball Drift destroys the Rock Piles Bouldus creates, dealing extra damage in the process
- Tunnelling Aniimo are immune to ranged attacks but can be knocked out by Tremor skills
- Irisal gains 1 Dance Power per skill hit, no matter how many targets that hit connects with
Earth and Grass ask you to pay attention to two different things. Earth is about the ground itself: what is sitting on it, what is under it, and who has just gone below it. Grass is about counters ticking up on your own bar while you keep hitting things.
Start with the type chart, because it decides who you bring. Earth attacks deal super-effective damage against Lightning and Ice, which makes an Earth attacker a major threat to lightning-based compositions. If your team leans on Lightning, an Earth opponent is the matchup you plan around rather than the one you improvise through.
The rest is execution. Waleetle wants its gauge full before it commits. Burrowers want you to stop using the attacks you were already using. Grass wants you to land hits and spend the result at the right moment.
Waleetle's Overload Energy decides when you press the button

Waleetle's Overloaded Engine trait charges Overload Energy, and a full gauge changes what the next skill does. At full charge, that next skill deals 40% extra damage. So the trait is really a timing rule. Charge, then spend on the skill you most want amplified, rather than on whatever comes off cooldown first.
Sandstorm Spin is the clearest case. Cast it on a fully charged gauge and the spin comes up to maximum speed immediately, instead of winding up. You get the damage bonus and the full-speed spin from the same charge, which is why holding the gauge for this skill is usually worth the wait.
Sandstorm Spin also deals increased damage to targets that are broken. That gives you an order to work in: break the target first, then spend the charged gauge on the spin. The bonus for hitting a broken target and the bonus from a full gauge land on the same cast.
40%
Extra damage on the next skill
Rock Piles are targets, not scenery

Bouldus can create objects and terrain interactions on the field, and Rock Piles are the ones you will meet most. Treat them as part of the fight rather than background clutter.
Waleetle's Stone Ball Drift destroys the Rock Piles Bouldus creates, and it deals extra damage for doing it. That is a specific answer to a specific thing on the ground, and it is the reason a Waleetle and Bouldus pairing reads differently from two attackers standing in the same place. One side builds the field, the other side runs through it.
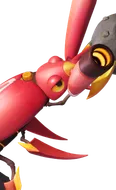
When something goes underground
Minespine, Geodeback and Pebbling can tunnel underground. While they are down there, they become immune to ranged attacks. If your whole answer to a fight is ranged damage, a tunneller simply turns that answer off until it resurfaces.
Tremor skills are the counter. A tunnelling Aniimo is vulnerable to them, and a Tremor skill can knock it out outright. The official description of the Tunnel ability also states that Pound skills can knock the tunnelling Aniimo into the air, which gets it out of the ground and back where the rest of your kit works.
The practical lesson is to keep one of those tools on the team. Going in with nothing but ranged pressure against a roster that tunnels is how a fight stalls.
Ranged attacks
- Tunnelling Aniimo are immune to ranged attacks.
- Minespine, Geodeback and Pebbling all tunnel underground.
Tremor and Pound skills
- Tremor skills hit tunnelling Aniimo and can knock them out.
- The official Tunnel description says Pound skills can knock the tunneller into the air.
Grass fights with counters
Leafy can create and interact with grass terrain, so the same principle from Rock Piles applies on the Grass side: the field is something a Grass Aniimo actively changes, not a backdrop.
Thornblade works off Sword Dance stacks. Its basic attacks can consume those stacks to deal boosted damage, which means your basic attack is not filler once stacks are up. It is the payout.
Irisal builds Dance Power by landing skill hits, gaining one point per hit regardless of how many targets are struck. That detail matters for how you play: hitting a crowd with one skill is not a shortcut to a faster build, so consistent hits beat wide ones when you are charging. Bloom Cluster adds another source, granting Irisalis 1 Dance Power whenever one of its clones lands a hit, and at 9 Dance Power the next skill costs 50% less EP. That is the moment to fire your most expensive option rather than your cheapest.
Where to start
Bring an Earth attacker into lightning-based teams, keep a Tremor or Pound option on hand for tunnellers, and learn to hold Waleetle's gauge instead of spending it early. Grass rewards the same patience: land hits, watch the counter, spend at the peak.
Most of this page was re-checked against the released game on 18 September 2026. The rest has not been re-confirmed since release.